Figures
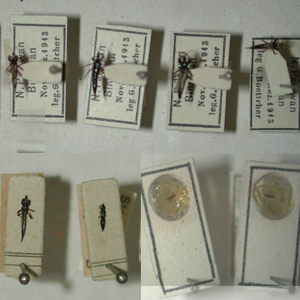
Fig. 1: Thrips collection, insects pinned to small card triangles or glued with a drop of balsam
Fig. 2: Laurence Mound and Alice Wells collecting thrips with a tiny brush directly from leaves into a plastic Eppendorf tube with AGA as fixation fluid
Fig. 3: Brush, needles, specially prepared micro pins and embryo dish
Fig. 4: Micro pin with a bend eye (www.wpiinc.com; World Precision Instruments)
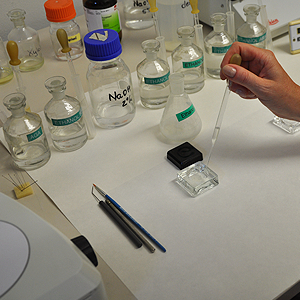
Fig. 5: Sequential concentration of Ethanol referred to as Ethanol row
Fig. 6: Change of thrips specimens through ethanol concentrations with a fine glass pipette
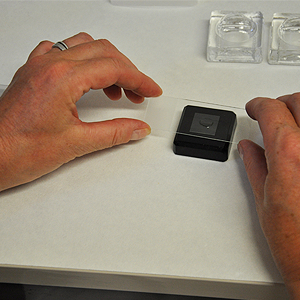
Fig. 7: Mounting of a thrips with a drop of Canada Balsam on a cover slip just before the microscopic slide surface touches the cover slip (re-invert the slide quickly after this step).
Fig. 8: Mark on the microscopic slide to aid placing the thrips at the centre with head pointed towards the preparator
Fig. 9: Slide placed on a hot-plate (temperature around 40°C)
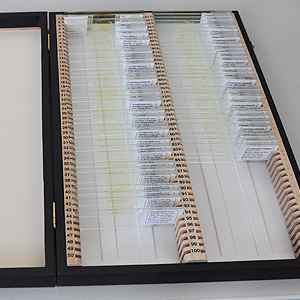
Fig. 10: Typical 100 slide box for storage of thrips collections
Fig. 11: Sternites VI and VII with clear chaetotaxis after good preparation
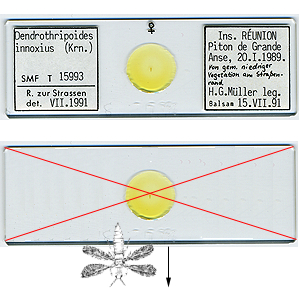
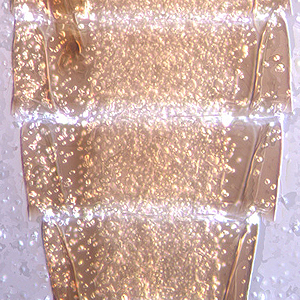
Fig. 12:
Sternites VI and VII with grease drops, sign for a too short or wrongful placement in ethanol fluids
Collecting
Several methods are useful to collect thrips and depends on the targets observed. Thrips collections with thrips pinned to small cards are of limited use and identfication is mostly impossible (Fig. 1). For routine checks within glasshouses or field experiments an exhaustor allows capturing of microinsects quickly and safely. In a second step the insects are then transferred to a fixation fluid. One of the best methods of collecting thrips is to beat the target plant tissue (vegetation, grass, leaves, flowers or branches) over a yellow or white plastic tray using a heavy stick. Thrips can be removed with a fine brush from the tray surface and inserted into collecting vials (Fig. 2) with a fixation fluid AGA and a small pencil written informative label. The fixation fluid AGA, is a mixture of 60% ethyl alcohol, glycerine and acetic acid (6:1:1) (Mound & Pitkin 1972; Palmer et al. 1989).
Slide preparation
The majority of thrips species cannot be recognized without mounting specimens onto microscopic slides, because many character states need magnifications up to 400x for exact interpretation.
Mazeration or clearing
Maceration or clearing is the process by which the internal body contents of the thrips are removed leaving the cuticle intact. All species should be carefully macerated to remove the whole body contents (Fig. 3-5). The mazeration level is very important for examination of specimens with phase contrast or differential interference contrast (DIC). The DIC is necessary for interpretation of colors.
1. Place thrips in a glass embryo dish and replace AGA-fluid with clean 60% ethanol and store for at least 24 hours (Fig. 5).
2. Remove the ethanol with a pipette, add a few drops of distilled water then an equal number of drops of 5% NaOH solution (pale specimens may require only one hour, others can be left overnight, black specimens may be left for days under careful visual check)(Fig. 6).
3. Transfer the specimens from NaOH solution to distilled water for a few hours, then into 60% ethanol, using a special needle with a wire loop (Fig. 4).
4. Store the specimens in 60% ethanol for 24 hours.
Dehydration
5. Replace the 60% ethanol with 70% ethanol and leave for about 1 hour (Fig. 5 and 6).
6. Replace with 80% ethanol and leave for 20 minutes.
7. Replace with 95% ethanol and leave for 10 minutes.
8. Replace with absolute ethanol and leave for 5 minutes.
9. Replace with fresh absolute ethanol and leave for another 5 minutes.
10. Transfer to clove oil and leave for about half an hour, or until fully cleared, before mounting.
Mounting
11. Place a clean cover slip onto the mounting block; put a drop of Canada Balsam onto the centre of the cover slip. Place one thrips specimen with ventral side upwards. Mark the centre of a microscopic slide to aid placement of thrips in the middle of the slide, with head pointed towards the preparator (Fig. 7 and 8).
12. Spread the legs and wings, and straighten the antennae by pressing and massaging on the basal segments with a fine needle.
13. Place a small drop of balsam in the centre of a clean microscope slide, invert this and lower firmly but gently onto the specimen in balsam on the cover slip. It is recommended that you start lowering the slide from the tenth abdominal segment end so that wings and setae are pressed towards the head for clear viewing.
14. As soon as the surfaces touch, re-invert the slide with the cover slip adhered to the slide.
15. Place slides on a hot-plate (temperature around 40°C) for several days
(Fig. 9)
(Moritz et al. 2004).
Labeling
16. The right hand label should give information to the plant, country, locality, date and name of the collector.
17. The left hand label should contain information to sex, genus and species name.
(Please orientate the slide with the head of the thrips directed towards the preparator before labeling. This is important for later microscopic studies to have the head on "twelve a clock" under the microscope (This is not clear will have to be rephrased) (Fig. 8).
Storage
18. Thrips specimens are stored in a typical 100 slide boxes, made from wood or plastic (Fig. 10)
Failures
19. An acceptable slide is one with recognizable clear structures, bristles which are not influenced by body contents (Fig. 11). But if changes through different ethanol concentrations are wrongly done or done too fast, useless slides with grease drops or body content, like fat and muscles become visible and character states are not visualized clearly (Fig. 12).
Montage photographs
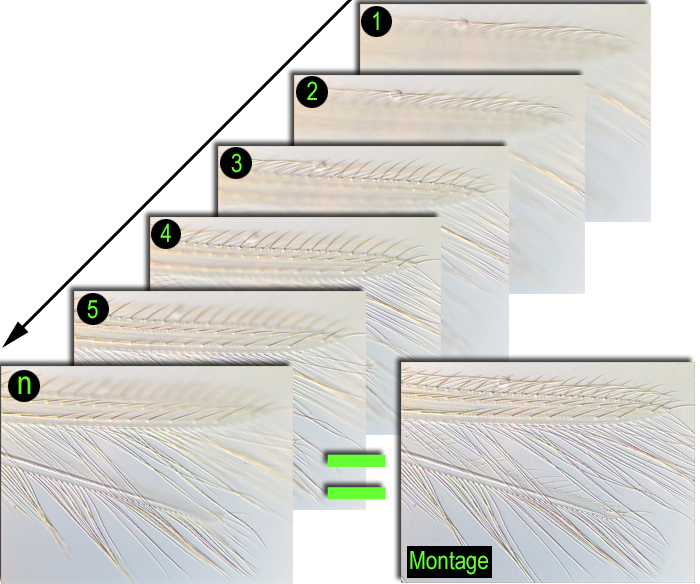
Once on slides it is difficult to view the entire character state of interest without adjusting the focus of the microscope due to the depth of the field. In single photographs of the character states focus of the entire depth of the field is impossible and character states are not viewed clearly. Montage strategies are unique in that they store a series of several photos at different depths of field i.e., from the dorsal to the ventral side in a temporary store. Once all the photos are taken, montage software merges the temporary photos into one photo image so that all the depths of field are in focus (Fig. 13).
The morphological character states presented in this key for each thrips are color montage images taken using Automontage Pro V5.01 (Syncroscopy, Cambridge) or the Leica Application Suite V3.5 (together with a Leica Microscope DM 5000 B). Using Montage software aids in accurate and quick presentation of thrips character states using clear three dimensional pictures worldwide.
Moritz G, Mound LA, Morris D & Goldarazena A (2004). Pest thrips of the world - an identification and information system using molecular and microscopial methods. Centre for Biological Information Technology, University of Queensland, Australia, CDROM ISBN 1 86499 781 8
Mound LA & Pitkin, BR (1972). Microscopic Whole Mounts of Thrips (Thysanoptera). Entomologist`s Gazette 23: 121-125.
Palmer JM, Mound LA & du Heaume GJ (1989). 2. Thysanoptera, 73 pp. In Betts CR [ed.], CIE Guides to insects of importance to man. CAB International, Wallingford, Oxon, UK